Blog
How to Make a Resin & Wood Coffee Table: A First-timer How-to

DISCLAIMER: The images in this post are for informational purposes to illustrate potential possibilities, recognizing that individual tastes vary. We aim to capture your wants and needs, expanding on each style where possible to offer a range of available options from reputable designers and affiliated brands. This selection process considers a variety of factors to ensure we cater to the diverse preferences of our readers.
Eager for a fun and creative way to spruce up your living space? Look no further! Imagine having a coffee table that you created with your own two hands—a table that is one of a kind. Through our insight and guidance, you can assemble a ravishing resin and wood coffee table that will be the envy of all your friends. Don’t worry if you’re new to working with epoxy resin, our steps will steer you through each step of the process.
By the end, you’ll have a table to be proud of that will add character to your home setup. You can customize the table’s look to suit your preferred style, whether you favor a smooth, glassy finish or want to embed natural elements like shells, stones, or wood shapes into the resin. Are you ready to unleash your creativity and start building? Let’s get started!

Photo by Micloggi76 from Freepik
Resin and Wood Coffee Table: Choosing the Wood Type
The wood you choose for your table is critical since it will be prominently featured. Hardwoods like oak, maple, and ash have exquisite grain patterns that shine through resin. They’re dense, durable, and dimensionally stable, meaning they won’t warp easily.
Related Article: 20 White Oak Coffee Table Ideas for Ravishing Rustic Refinement
Softwoods like pine can work too, but they’re more prone to denting and staining. If using softwood, choose a premium kiln-dried board. Either way, start with lumber that’s been planed smooth on all sides. Rough-sawn wood will create air bubbles in the resin. For the tabletop, select wider boards, at least six to eight inches. Narrower boards may warp or split over time. Glue the boards together, then clamp them until the glue dries to create a solid panel. Fill any gaps with wood filler and sand until perfectly smooth.
Read More: Create a Warm Welcome With 24 Pine Coffee Table Design Styles
The base can be constructed from either multiple narrow boards or a single thick board. For added stability, attach crossbars between the legs. Sand any sharp edges. Once you have your wood, clean it thoroughly to remove dirt or oils. Wipe away dust with a tack cloth. Your wood needs to be completely clean and dry for the resin to adhere properly.
For More Info: A Guide to Classic Modernity With 33 Wood Coffee Table Designs

Photo by Sergeyparser from Freepik
Insight – Mix in color or additives into the remaining resin to add pizzazz to your resin project. Be bold and pour the mixture in various patterns or drop inclusions like stones into the wet resin.
Selecting and Mixing Your Resin for Maximum Durability
Now for the fun part—mixing your resin! For the most durable tabletop, you’ll want an epoxy resin formulated explicitly for countertops or bar tops. These resin systems are designed to withstand heat, scratches, and stains. Two popular brands are Stone Coat Countertop Epoxy and Pro Marine Supplies Table Top Epoxy.
Before mixing the resin, ensure you have all the necessary supplies: respirator masks, gloves, mixing cups, stir sticks, a scale, and a catalyst (the hardener that activates the resin). Carefully measure equal parts resin and catalyst by volume or weight, depending on the product instructions.
Mixing the Resin
Mix the resin and catalyst in a well-ventilated area and wear proper safety gear. Gently stir the two parts together for several minutes until completely merged. Be careful not to create air bubbles. Let the mixture sit as directed so any bubbles can rise to the surface before pouring.
The working time, also known as pot life, is the period in which the resin remains liquid after mixing and is still usable. Be ready to pour the resin onto your tabletop within this window. If the resin thickens too much, it won’t self-level or bond as well to the wood. For the best results, pour in layers, waiting for each layer to partially cure before adding the next. This helps prevent overheating and allows air bubbles to escape.

Photo by Donbaron from Freepik
Insight – To eliminate any remaining air bubbles effectively, use a heat torch and run it over the surface of the wet resin. Don’t hesitate to reapply the resin to achieve the desired finish.
Applying the Resin to the Tabletop
Now that your wood tabletop base is constructed, it’s time to apply the resin. This step requires patience since multiple layers are needed, but the end result will be a smooth, glossy finish.
Gather the Supplies
You’ll require a few essentials to proceed: resin (epoxy or polyurethane), hardener, stir sticks, paint brushes, gloves, and a respirator mask. The resin and hardener you decide on depends on how deep of a pour you want. For a coffee table, a medium-viscosity resin works well. You’ll also want a work area that’s dust-free, well-ventilated, and not in direct sunlight.
Mix the Resin
Mix the resin and hardener in a bucket according to the product directions. Typically, it’s a 1:1 or 2:1 ratio. Stir slowly and thoroughly with a stir stick for several minutes. Ensure there are no streaks or swirls—the mixture should be completely blended.
Gain Insight: Craft a Custom Piece With Our 19 DIY Coffee Table Design Ideas

Photo by iBunny from Freepik
Insight – It is necessary to lay a coat of primer on the wooden base and ensure it dries completely. This is crucial to enrich the adhesion of the resin material.
Apply the First Coat
Use a paintbrush to apply a thin, even coat over the entire tabletop. Let it sit until tacky to the touch, usually three to six hours. Then, use 320-grit sandpaper to lightly scuff the surface. This helps the next coat adhere better.
Apply Additional Coats
Repeat the process of applying a coat, letting it get tacky, and scuffing with sandpaper. For most tables, three to five coats are needed. The more coats you add, the thicker and glossier the finish. Apply the final coat and do not scuff; let it harden completely.
Final Touches
Once hardened, you may need to buff the surface with progressively finer grits of sandpaper (400, 600, 800) to smooth everything out. You can also use a buffing compound and an electric buffer for an ultra-smooth finish. Apply furniture pads to the bottom of the table base, and your resin and wood coffee table is ready to use!

Photo by user7383302 from Freepik
Demolding and Finishing the Table
Once your resin has cured completely, usually within 24 to 48 hours, it’s time to de-mold your table. This is an exciting step, as you finally get to see the results of all your hard work!
Releasing the Mold
Carefully remove the outer mold or box from around your table. If you built a frame to contain the resin as suggested, disassemble it piece by piece. Work slowly and cautiously so you don’t crack the resin.
Finishing Up
You may notice imperfections in the resin surface. Don’t worry—you can sand and polish it to your satisfaction. Start with coarser grits of sandpaper, around 220 to 400, to smooth the major imperfections. Work your way up using progressively finer grits, like 600 to 800. Wipe away dust with a tack cloth as you go.
To achieve an ultra-glossy finish on the resin surface, it’s important to buff and polish it using the right techniques. You can use a rotary tool or drill with a buffing pad and apply polishing compounds in small circular motions. Begin with a cutting compound, followed by a polishing compound, and finish with a jewel resin or diamond polish. By following these steps, you can ensure that your resin surface is crystal clear, highly reflective, and looks its best.
Gain Insight: Sand, Stain, Seal: A Guide On How to Refinish A Coffee Table
If your wood base has any rough or uneven edges, now is the time to sand those. You can also stain or seal the wood at this point if desired. Once all finishing touches are complete, attach the resin top to the wood base. Wood glue, epoxy, or silicone work great for doing this.
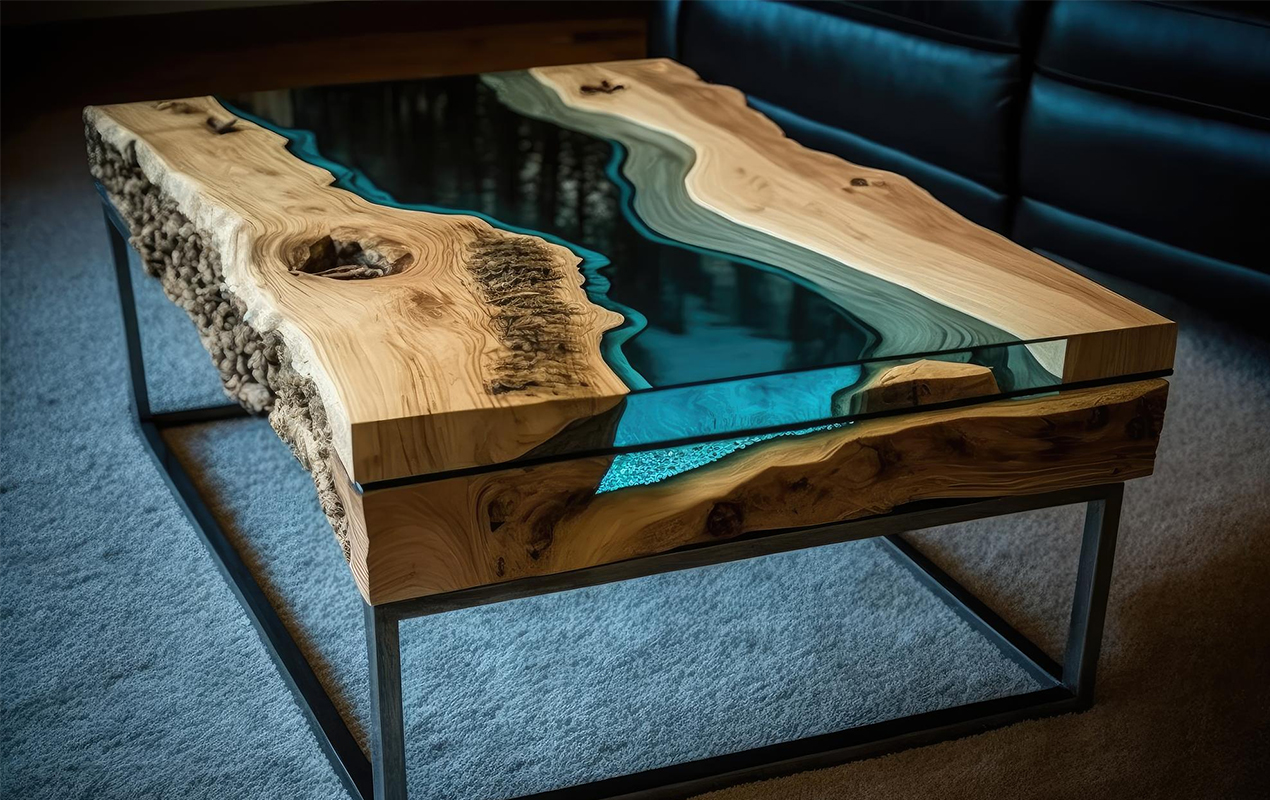
Photo by Studioworkstock from Freepik
Insight – To form the resin surface, it is imperative to assemble suitable molds. Plastic containers or silicone molds in the desired shape can be used for this purpose.
Final Thoughts
Well done! You reached the end of our guide to crafting a resin and wood coffee table. As you may have come to realize, the project is more manageable than initially anticipated. Soon, you can enjoy the fruits of your labor with a unique furniture piece that will make your guests envious.
Discover More: 27 Coffee Table Design Ideas You Never Knew You Needed
The most satisfying part of the experience is simply the art of creating; this project may even ignite a passion for woodworking and open up a whole new creative outlet for you. If you have caught the DIY bug, there are numerous other pieces you can make. So, roll up your sleeves, keep a guide on hand, and get stuck in, DIY style!

